If you're wondering how to grow herbs in pots for your indoor herb garden, this guide will help you get started. These steps will help you get started with seeds or cuttings, choose the right pots and water. You'll soon be able to grow your own delicious herbs after reading this article. You will soon have a beautiful indoor herb plant that is full of healthy herbs.
Growing directions for herbs in an indoor herb garden
There are several key steps to growing an indoor herb plant. You must first get the potting mix soaked. Don't let the potting mixture get too wet. Soak it for at least 30 minutes. It will help to reduce stress and let the herb start slip out of its original container. For maximum freshness, ensure you follow the instructions for each herb plant.
Herbs need sunlight. A south-facing window is the best spot for them. Herbs thrive in direct sunlight and need six hours each day to grow. Plants that aren't getting enough light won't thrive in the middle or near windows with northern exposure. Make sure to rotate potted indoor herbs every week. They will grow evenly if they are rotated in a quarter-clockwise direction.
When planting herbs, remember that they need six to eight hours of direct sunlight every day. Consider buying organic plant food or liquid fish oil emulsion for those who don't have direct sunlight. You can rotate the pots during summer so that they are exposed at both ends to the sun. Too early harvesting can also cause herbs to become stunted. Be sure to wait until the plants reach 6 inches before you cut the foliage.
It is crucial to water your herbs, but it can be difficult. The easiest way to determine if the soil is wet or dry is by placing your finger in the container and pressing it into the soil. It should be watered more often if it feels damp or muddy. Always drain the soil into the sink after watering. This will help prevent disease and fungus invading the indoor herb garden.
Start with seeds or cuttings
In order to grow indoor herbs from cuttings or seeds, it is essential that the soil remains moist. Because of the roots that are attracted to the moisture below, seedlings will sprout from dry soil surfaces. If you have more than one seedling, thin them. Thin the seedlings to the strongest one in each container. Once they sprout two sets, transplant them to larger containers.
The best soil for planting cuttings is one without any contamination. This mixture has all the nutrients plants need. A sterile soilless mix is the best choice for setting cuttings. You may also need a propagation tray to hold the cuttings. These are available at garden supply stores. Make sure to use sterile compostless mix for propagation. Before placing the cuttings in the soil, it is best to thoroughly dampen them.
It's not difficult to grow indoor herbs. Potting soil can be bought from a local garden center or mixed with dirt that you have on the ground. You should not use plain dirt when planting. It is not recommended to transfer the soil into containers as this can cause damage to the plants. A fine soil is the best soil to plant indoor herbs.
A trusted source should sell herbseeds. It is best to buy high-quality seeds and to start your plants as soon as they are available. A trusted retailer is the best place to start an indoor herb farm. Aside from being cheaper and easier to maintain, it doesn't require much maintenance and requires less time than starting from seeds.
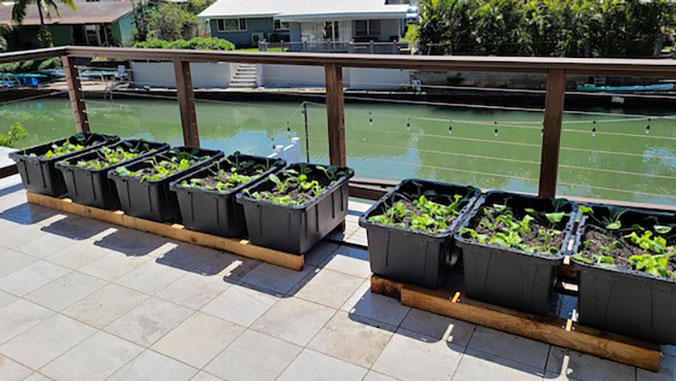
The best pots

Pots for indoor herb gardens come in many styles. For a traditional, elegant look, choose neutral pots. Neutral colors blend in with the rest of your garden, making your herbs the main attraction. Avoid too many colors; try to stick with two complementary colors. Bright pots will bring a playful aspect to a modern or eclectic yard. It is important to choose the right pots that will best suit your herb garden.
Look for containers that are well-draining. You can find most pots with drainage holes. If you prefer, you can add your own. Smart Pots are fabric planters that come in many sizes. They can hold one herb plant or an entire garden. Choose a planter with drainage holes for the best results. These herb containers come with drainage holes and are available in a variety colors, including pastels to bright.
Pots are important for herbs. A large pot will be more appealing than 15 small ones. Pots with similar growing requirements can be placed in large planters, and medium and small pots can be placed in front of them to form small groups. You can spend some time at the garden centre to find the right pots for your home. If you are working in a small area, the size of your container herb gardening is very important.
Proper lighting is essential for successful herb growth. Herbs require between 6 and 8 hours of bright lighting daily. Southerly and southwestern windows receive the greatest amount of sunlight during the day. While east-facing windows get some light throughout the day, they also receive less light. If this isn’t possible you can use grow light or a south-facing window. These lights mimic sunlight, and will ensure your herbs thrive.
Watering
The best way to water indoor plants is slow and steady. The humidity of your home will determine how often you water the herb pots. To ensure adequate water, make sure you remove plants with large roots or too small. You should water your herb pots in a cooler window sill. When the soil is dry, it should be checked by a finger. If they are too moist, they will require more water.
Using a tray to catch excess water is a great way to prevent overwatering. Each herb pot should be able to hold eight square inches. Good air circulation is key to herbs' success. To keep their leaves healthy and free of disease, they need adequate air circulation. Pots can be unattractive and make it difficult to maintain proper soil moisture. To prevent this problem, consider using a tray or container that is large enough for the herb pots to grow.
If you use a grow lamp, rotate it every week. If your plants do not have adequate sunlight, add supplemental grow lamps. Grow lamps give your plants additional light for 12 hours per day. You should ensure that the grow lamp is at the least six inches above your herb. Adjust the light time to fit the plants' needs. If your plants begin to show signs that they are experiencing low growth, then you can take out the supplemental lamp.
You can ensure the best humidity by placing small stones near your herbs. You can place the dish on a tray of gravel, pebbles or stones to create a 50% humidity environment. A humidifier near the plants is a good option if humidity is low. You can measure the humidity using a soil moisture tester. Next, you will need to water the plants properly.
Pests
You need to be on the lookout for common pests in indoor herb gardens. Both spider mites, as well as apids, are very common in indoor herb gardens. However they rarely cause major damage. These insects are known to eat roots of many herbs, and often leave shiny, black spots on the leaf. Spittle insects leave an unsightly frothy film on the foliage that is easy to get rid of with water. Fungal diseases can also cause considerable damage to your herbs. Fusarium root rot will leave a brown streak on your herb plants' stems and can kill the plant.
Although there is no magic bullet for eliminating aphids from your garden, some herbs have essential oils that can repel them. Cedar oil, which has a strong juniper scent, repels aphids. Citronella essential oil can also be used to repel pests.
Aphids: These tiny, nimble insects are a pest to any indoor herb garden. They are usually less than one quarter of an inch in size and feed by sucking the sap from plants. Aphids are a major threat to plant health and can be fatal. Aphids are very difficult to remove because of their complicated life cycle. They lay eggs every day and give birth to live young. Aphids can cause severe damage to your plants, and can drastically reduce their yield.
Aphids, the most common pest in indoor herb garden gardens, are the Aphids. Aphids are easily identified by their distinctive white appearance. They can cause leaves to turn brown, or even fall off. Aphids live under leaves and whiteflies are tiny, waxy bugs that are only visible with a magnifying device. Neem Oil, a plant oil derived from the neem tree, prevents insects from laying eggs. Ladybugs, beneficial for your herbs, are also available as live insects.
FAQ
Which kind of lighting is most effective for growing indoor plants?
Because they emit less heat then incandescent lamps, floralescent lights can be used indoors to grow plants. They also provide consistent lighting without flickering or dimming. Fluorescent bulbs can be purchased in regular and compact fluorescent versions. CFLs use up to 75% less energy than traditional bulbs.
What is a planting schedule?
A planting plan is a list of plants to be planted at different times each year. The goal is for plants to grow at their best while minimizing stress. Early spring crops like spinach, lettuce, and peas must be sow after the last frost date. Summer beans, squash, cucumbers and squash are all later spring crops. Fall crops include cabbage, potatoes, cauliflower, broccoli and cauliflower.
Does my backyard have enough space for a garden?
If you don't already have a vegetable garden, you might wonder whether you'll have enough room for one. The answer is yes. A vegetable garden doesn't take up much space at all. You just need to plan. For instance, raised beds could be constructed only 6 inches high. You can also use containers as raised beds. Either way, you'll still get plenty of produce.
Can I grow fruit trees in pots?
Yes! If you have limited space, fruit trees can be grown indoors. Your pot should have drainage holes to ensure that the tree doesn't get rotted by excess moisture. Make sure the pot is deep enough for the root ball to be held. This will protect the tree from being stressed.
Statistics
- According to the National Gardening Association, the average family with a garden spends $70 on their crops—but they grow an estimated $600 worth of veggies! - blog.nationwide.com
- Today, 80 percent of all corn grown in North America is from GMO seed that is planted and sprayed with Roundup. - parkseed.com
- According to a survey from the National Gardening Association, upward of 18 million novice gardeners have picked up a shovel since 2020. (wsj.com)
- It will likely be ready if a seedling has between 3 and 4 true leaves. (gilmour.com)
External Links
How To
How to apply Foliar Fertilizers
Foliar fertilizers are applied directly to the leaves of plants through spraying. Foliar fertilizers are used to provide nutrients to plants. They also help to increase photosynthesis and water retention, resist disease, protect against pests and promote growth. They can be used to treat all plants, including fruits, vegetables and flowers as well as trees, shrubs, lawns, and grasses.
Foliar fertilizers do not pose a risk for soil pollution. The fertilizer required depends on the type and size of the plant as well as how much foliage it has. Foliar fertilizers should only be used when the plant is active growing. This allows the plants to absorb the nutrients more quickly. When you're ready to fertilize your garden, follow these steps:
-
It is important to know the type of fertilizer that you need. Some products contain only one nutrient; others include multiple elements. Ask your local nursery or gardening center if you don't know which product you need.
-
Pay attention to the instructions. Before you spray, make sure to read the label. Spraying near windows and doors can cause damage to the structure. Keep it out of the reach of children and pets.
-
Use a hose attachment if available. If you don't want to spray too much, make sure to turn off your nozzle after each few sprays.
-
Be careful when mixing different types of foliar fertilizers. Mixing two different types can have harmful effects, including burning or staining.
-
Spray the fertilizer at least five feet from any trunk. A minimum of three feet should be left between the tree trunks and the edge of your area where you plan for fertilizer application.
-
Wait until the sun goes down before applying. Sunlight causes light-sensitive chemicals in the fertilizer to break down.
-
Apply the fertilizer evenly to the leaves. Spread the fertilizer evenly over large areas.
-
Let the fertilizer air dry before watering.